Monday 30 September 2013

Composistion and Framing

Using Manual mode, we experimented different framing techniques we could use to create more interesting images.Here are four techniques I used:

Leading Lines
Here the line of the bus shelter roof and the straight line of trees next to it  draw you into the centre of the image. This technique is called 'leading lines' as you want to follow the lines in the image to see where they lead you.


Rule of thirds (portrait)
This portrait image of Callum uses the 'rules of thirds', as he and the tree are over to the left of the portrait. For this technique, you can set a 3x3 grid to come up on the camera screen and by placing the main object on one of the thirds (usually the left or right) it makes it look more interesting than it would be if the main subject was in the centre.

You can also place subjects on the intersection points (shown by he red circles on the grid below). For example, if you were taking a head shot, you would place an eye on one of the top corner intersecting points to make the image look more interesting. 


Symmertrical
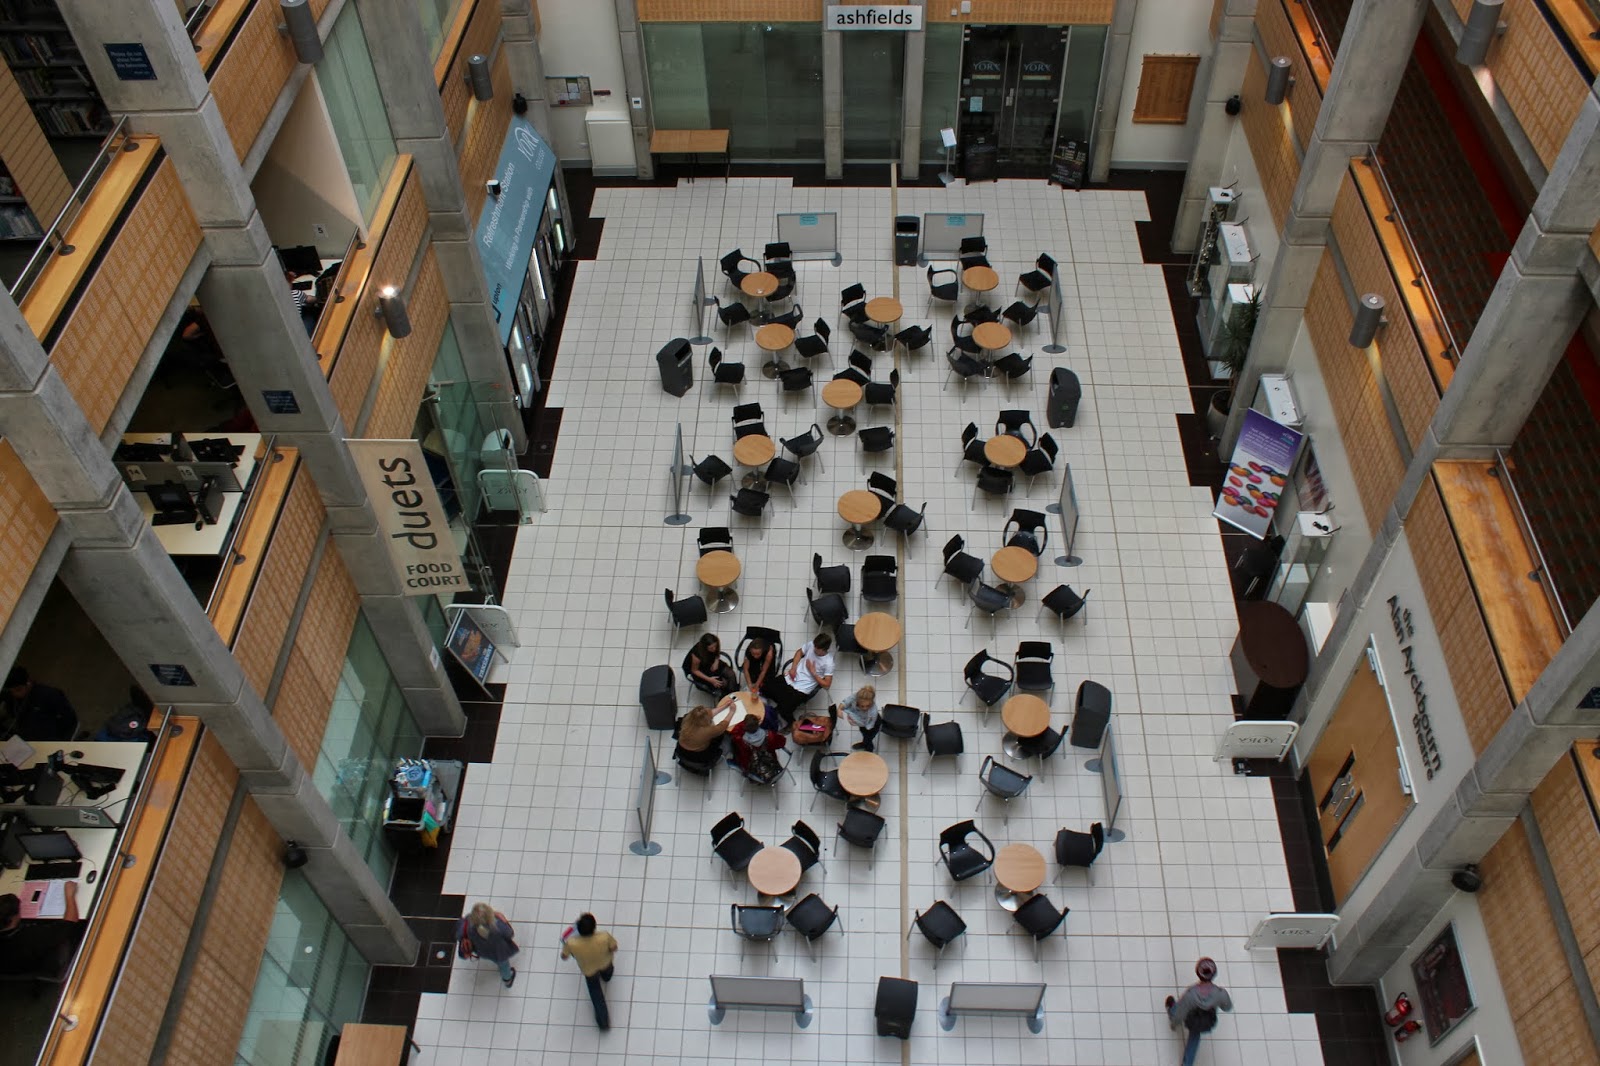
Here we can kind of see that if you were to split the image in half, each half would be the same. For this image, it's the tables and chairs and walls of the college that would make the image look symmetrical. You can also do identically symmetrical images.


Framing
This gives the subject more interest by using depth. Here we can see Callum in the distance, but in front of him, we can see out of focused leaves and branches. This adds depth to the image and makes the viewer feel like they are in the image because they get the illusion that they are stood right behind the leaves and branches.


Here are some of the images Callum took of me using some of the above techniques;


Wednesday 25 September 2013

Focal Length and Sensors


Different lenses have different focal lengths. The lens on the Cannon 600D I used is an 18mm - 55mm. The 18mm focal length would give you a wide angle shot, which you would use for images of subjects which are close to you or for landscapes. The 55mm focal length would give you a smaller angle as you are zoomed in. So you would take pictures of subjects which are far away from you. However, when taking head shots you would use a 55mm focal length because it avoids distortion. Here is my example;

 For this image I used the 18mm focal length and I had to stand very close to Amber to get all of her face to fit the whole portrait within the wide camera angle. As you can see, using an 18mm for portraits makes the persons face look wider and more distort and doesn't give you a real perspective as to what he persons face looks like. Also you can't see as much detail and the image can also look quite sharp.


For this image, I used the 55mm focal length. I was zoomed right in on Amber's face so I had to take a couple of steps back to fit her whole face in the portrait. As you can see, the face looks better than it does when using the 18mm length.This is because here is no distorion, therefore giving us a real perspective as to what she actually looks like. The overall image also looks softer and warmer as the background is out of focus, allowing us to focus on here face.


Sensor Sizes


In digital photography, the image sensor format is the shape and size of the image sensor. The image sensor format of a digital camera determines the angle of view of a particular lens when used with a particular camera. In particular, image sensors in digital SLR cameras tend to be smaller than the 24 mm × 36 mm image area of full-frame 35 mm cameras, and therefore lead to a narrower angle of view.
File:Sensor sizes overlaid inside - updated.svg


Exposure Triangle - Manual mode only

Using the manual mode leaves you in full control of the shutter speed, aperture and ISO settings. Leaving you to create many different types of photos, here are some of my examples when I used manual mode:

 For this picture I used a very high shutter speed, around 1/400, this enabled me to capture the quick movement of the three people jumping and  for the image to still be in focus.I used low aperture of around f/5.6, which allowed more light entry into the camera. Finally I set the ISO on 200 as it was quite bright outside.
For this image I wanted to create the effect of something out of focus, and in this image it's the car. To get this effect I set the a very lower shutter speed, around 1/4, this meant the shutters in the lens would stay open for longer, allowing me to capture a blurred image of the car driving past. Again my aperture was quite low, around f/9, to allow more light into the camera lens and I kept the ISO on 200.
For this image, I used a very high Shutter speed, the highest it would go, 1/4000. This is because the action of dropping a penny was going to happen very fast, so i needed a fast shutter speed to capture the image of the penny falling. I also ser my aperture on the lowest it would go, f/3.5 to get as much light into the lens as possible on such a high shutter speed. Before taking the image, I checked the exposure meter to see if the shutter speed and aperture were correct, however, the meter showed me that my image would be under exposed by 2, so what I did was increase the ISO by 2, up to 800 and this gave me a balanced exposure to capture the image.

Sunday 22 September 2013

So what is a camera?

The first camera.

Photographic cameras were a development of the camera obscura, a device dating back to the ancient Chinese and ancient Greeks,  which uses a pinhole or lens to project an image of the scene outside upside-down onto a viewing surface.


On 24 January 1544, mathematician and instrument maker Reiners Gemma Frisius of Leuven University used camera obscura to watch a solar eclipse.

Before the invention of photographic processes there was no way to preserve the images produced by these cameras apart from manually tracing them. The earliest cameras were room-sized, with space for one or more people inside; these gradually evolved into more and more compact models such as that by Niépce's time portable handheld cameras suitable for photography were readily available. The first camera that was small and portable enough to be practical for photography was envisioned by Johann Zahn in 1685, though it would be almost 150 years before such an application was possible.


What next?

Louis Daguerre and Joseph Nicéphore Niépce (who was Daguerre's partner, but died before their invention was completed) invented the first practical photographic method, which was named the daguerreotype, in 1836. Daguerre coated a copper plate with silver, then treated it with iodine vapor to make it sensitive to light. The image was developed by mercury vapor and fixed with a strong solution of ordinary salt (sodium chloride).
35mm
35 mm film is the film gauge most commonly used for chemical still photography (see 135 film) and motion pictures. The name of the gauge refers to the width of the photographic film, which consists of strips 34.98 ±0.03 mm (1.377 ±0.001 inches) wide.

Reflex Camera
The first practical reflex camera was the Franke & Heidecke Rolleiflex medium format TLR of 1928. Though both single- and twin-lens reflex cameras had been available for decades, they were too bulky to achieve much popularity.
A similar revolution in SLR design began in 1933 with the introduction of the Ihagee Exakta, a compact SLR which used 127 rollfilm. This was followed three years later by the first Western SLR to use 35mm film, the Kine Exakta (World's first true 35mm SLR was Soviet "Sport" camera, marketed several months before Kine Exakta, though "Sport" used its own film cartridge). The 35mm SLR design gained immediate popularity and there was an explosion of new models and innovative features after World War II. There were also a few 35mm TLRs, the best-known of which was the Contaflex of 1935, but for the most part these met with little success.
Digital
Digital cameras differ from their analog predecessors primarily in that they do not use film, but capture and save photographs on digital memory cards or internal storage instead. Their low operating costs have relegated chemical cameras to niche markets. Digital cameras now include wireless communication capabilities (for example Wi-Fi or Bluetooth) to transfer, print or share photos, and are commonly found on mobile phones.

DSLR's
Digital single-lens reflex cameras’ are digital cameras combining the optics and the mechanisms of a single-lens reflex camera with a digital imaging sensor, as opposed to photographic film. The reflex design scheme is the primary difference between a DSLR and other digital cameras. In the reflex design, light travels through the lens, then to a mirror that alternates to send the image to either the viewfinder or the image sensor. The alternative would be to have a viewfinder with its own lens, hence the term "single lens" for this design. By using only one lens, the viewfinder presents an image that will not perceptibly differ from what is captured by the camera's sensor.


ISO


ISO is the camera’s sensitivity to light. It can range from 100 to 6400. If you use a higher ISO, say 3200 or 6400, then the image will be grainier. This is often referred to as ‘noise’. The lower the ISO, say 100 or 200, the more fine detail and less noise the image will have.  

If you are taking a picture in a dark environment then you need to use a high Iso. If you are taking a picture in a bright environment, then you need to use a low ISO. Here are some of my examples of ISO settings:


Here is an example if using different ISO settings. On the left we can see a clear bright image that isn’t too dark or too light; this is because I used an ISO of around 400 as the environment I was taking the photo in was quite bright.
On the right we can see the same image, however it is slightly too dark. This is because I set the ISO at around 800, which was too high for a bright environment.
This proves that it essential to set the ISO to the right setting to get a correct white balance.


Here is another example. It was quite dark at the underground car park, so therefore, I needed to use a high ISO to make sure you could see the final image. Above, I used an ISO of around 1600 and the picture is clear and you can see the definition of the cars and road markings. Below, I used a low ISO, of around 400 to show how if you set to too low in a dark environment then the final image will come out dark and you won’t be able to see much detail within the image.


Wednesday 18 September 2013

Aperture

Aperture is how big or small the blades in the camera lens open. It is measured in f/stops, so for example if you used a low setting, say f/5.6, then the background of the image will be blury and the focal point will be clear and crisp. This is because the lens will have a wide opening, allowing in more light and a shallow depth of field. If you use a high aperture, say f/32, then the whole image will be very clear and crisp. This is because the lens will have a small opening. For these images I used an aperture of f/5.6 so that i could focus on one subject within the image to be clear and then the rest of it would be bury. This effect makes pictures look more interesting and more appealing to the eye.


Shutter Speeds

By changing the shutter speed, this allows the photographer to either freeze of slow down the action of a particular subject


For this image I used a low shutter speed so that the moving object in the image would blur. I set the shutter speed at around ¼, with the aperture and ISO on auto. The lower you set the shutter speed, the longer it takes for the shutters to close and open again, allowing more light into the lens.

Other images you could take using a low shutter speed could be of running water, fireworks or a time laps.


For this image I used a high shutter speed because the action in the image was moving fast. I set the shutter speed at around 1/500, with the aperture and ISO on auto. I also used flash in this image as it was quite dark where the photo was taken. The flash also gives more depth to the final image. By using a high shutter speed, the shutters close and open really fast, allowing less light into the lens, but also capturing the image quickly.

Other images you could take using a high shutter speed are action shots such as sports or people jumping.